


Custom Cursor (CSS)

Documentation
Webflow
Code
Setup: External Scripts
External Scripts in Webflow
Make sure to always put the External Scripts before the Javascript step of the resource.
In this video you learn where to put these in your Webflow project? Or how to include a paid GSAP Club plugin in your project?
HTML
Step 1: Copy structure to Webflow
Copy structure to Webflow
In the video below we described how you can copy + paste the structure of this resource to your Webflow project.
Copy to Webflow
Webflow structure is not required for this resource.
Step 1: Add HTML
HTML
HTML structure is not required for this resource.
Step 2: Add CSS
CSS
/* Cursor "default" */
body,
body :is([data-cursor="default"], [data-cursor="default"] *),
body * {
  cursor: url("https://cdn.prod.website-files.com/684fd3662bf373c304f927ef/684fd3faf1928131d9db6e0d_936bd88147511144743f09f4477f4c1a_cursor-default.svg") 2 0, auto;
}

/* Cursor "text" */
body :is([data-cursor="text"], [data-cursor="text"] *),
body :is(p, h1, h2, h3, h4, h5, h6, input[type="text"], textarea) {
  cursor: url("https://cdn.prod.website-files.com/684fd3662bf373c304f927ef/684fd3fa187280f5367673ab_a5441e26d72d35676d51172bd3a38038_cursor-text.svg") 9 19, text;
}

/* Cursor "pointer" (Hover) */
body :is([data-cursor="pointer"], [data-cursor="pointer"] *),
body :is(a, a *, a p, button, button *, select, input[type="submit"], input[type="button"], input[type="radio"], input[type="checkbox"]) {
  cursor: url("https://cdn.prod.website-files.com/684fd3662bf373c304f927ef/684fd3fa2e5a792140becaff_2b1e000c885a11daa778a26530dd8999_cursor-pointer.svg") 12 0, pointer;
}

/* Cursor "grab" */
body :is([data-cursor="grab"], [data-cursor="grab"] *) {
  cursor: url("https://cdn.prod.website-files.com/684fd3662bf373c304f927ef/684fd3fadd3e56db88677898_e4c3ca1346ce8749e9ebc404b2c38a67_cursor-grab.svg") 12 4, grab;
}

/* Cursor "grabbing" */
body :is([data-cursor="grabbing"], [data-cursor="grabbing"] *) {
  cursor: url("https://cdn.prod.website-files.com/684fd3662bf373c304f927ef/684fd3faadaedb1825819d22_93f8d20982e98baea5d26f613bf60af6_cursor-grabbing.svg") 12 0, grabbing;
}
Step 2: Add custom Javascript
Custom Javascript in Webflow
In this video, Ilja gives you some guidance about using JavaScript in Webflow:
Step 2: Add Javascript
Step 3: Add Javascript
Javascript
Step 3: Add custom CSS
Step 2: Add custom CSS
Custom CSS in Webflow
Curious about where to put custom CSS in Webflow? Ilja explains it in the below video:
CSS
/* Cursor "default" */
body,
body :is([data-cursor="default"], [data-cursor="default"] *),
body * {
  cursor: url("https://cdn.prod.website-files.com/684fd3662bf373c304f927ef/684fd3faf1928131d9db6e0d_936bd88147511144743f09f4477f4c1a_cursor-default.svg") 2 0, auto;
}

/* Cursor "text" */
body :is([data-cursor="text"], [data-cursor="text"] *),
body :is(p, h1, h2, h3, h4, h5, h6, input[type="text"], textarea) {
  cursor: url("https://cdn.prod.website-files.com/684fd3662bf373c304f927ef/684fd3fa187280f5367673ab_a5441e26d72d35676d51172bd3a38038_cursor-text.svg") 9 19, text;
}

/* Cursor "pointer" (Hover) */
body :is([data-cursor="pointer"], [data-cursor="pointer"] *),
body :is(a, a *, a p, button, button *, select, input[type="submit"], input[type="button"], input[type="radio"], input[type="checkbox"]) {
  cursor: url("https://cdn.prod.website-files.com/684fd3662bf373c304f927ef/684fd3fa2e5a792140becaff_2b1e000c885a11daa778a26530dd8999_cursor-pointer.svg") 12 0, pointer;
}

/* Cursor "grab" */
body :is([data-cursor="grab"], [data-cursor="grab"] *) {
  cursor: url("https://cdn.prod.website-files.com/684fd3662bf373c304f927ef/684fd3fadd3e56db88677898_e4c3ca1346ce8749e9ebc404b2c38a67_cursor-grab.svg") 12 4, grab;
}

/* Cursor "grabbing" */
body :is([data-cursor="grabbing"], [data-cursor="grabbing"] *) {
  cursor: url("https://cdn.prod.website-files.com/684fd3662bf373c304f927ef/684fd3faadaedb1825819d22_93f8d20982e98baea5d26f613bf60af6_cursor-grabbing.svg") 12 0, grabbing;
}
Implementation
Adding and Positioning the Cursor in CSS
To apply a custom SVG cursor, use the cursor property with a URL and hotspot coordinates. The URL points to your SVG file, and the two numbers specify the cursor’s “hotspot” (x, y) — the precise pixel within the image that will act as the pointer tip. You can adjust these values until clicks, selections, and hover states feel perfectly aligned. For example:
.element {
  /* URL to the SVG, then hotspot coordinates (12px from left, 4px from top), fallback to grab */
  cursor: url("path/to/cursor-grab.svg") 12 4, grab;
}
Creating your own custom cursor
You can design pixel-perfect cursors in your favorite vector editor. For example, our demo’s retro, blocky cursor was drawn pixel-by-pixel in Figma. But you can even prompt ChatGPT to generate a set of SVG cursors. Once you have your vector shapes, import them into Adobe Illustrator to trace the shape. Export each cursor as a standalone SVG file and host them where your site can access them and use as a background-image.
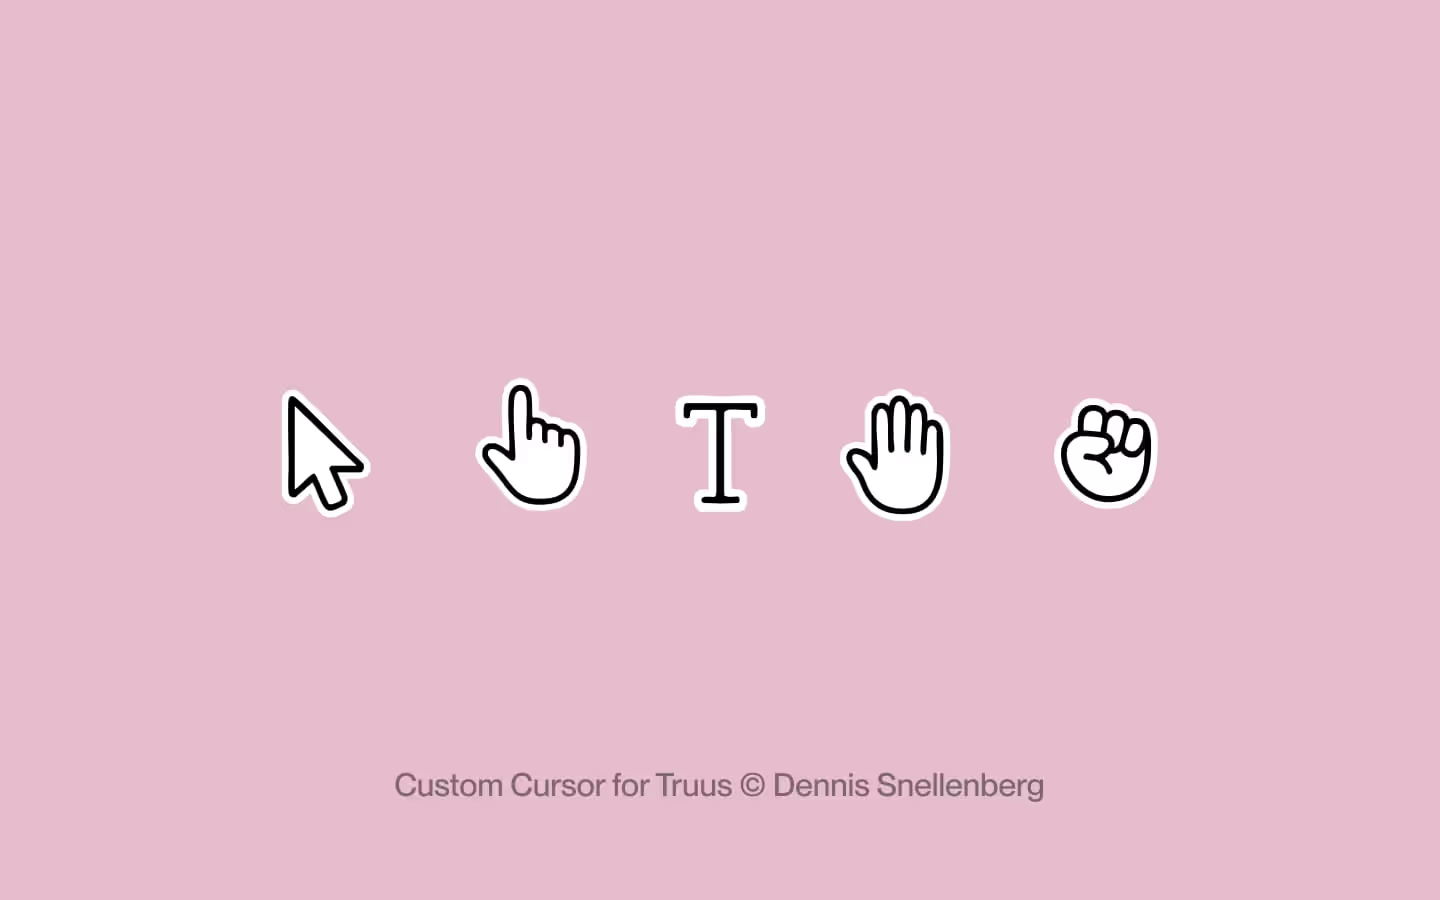
Below an example of how Dennis Snellenberg created a custom cursor for Truus.
Resource details
Last updated
December 16, 2025
Category
Cursor Animations
Need help?
Join Slack
Original source
 Osmo
OsmoCreator Credits
We always strive to credit creators as accurately as possible. While similar concepts might appear online, we aim to provide proper and respectful attribution.